Operator Guide · DTF Powerhouse Delta

From approved
to printed, packed and sent.

Everything the operator's PC does: the jobs that are ready, the print file for the printer, and telling the shop and the client where each job stands.

Designer's PC licence keyDesign & Project desk + Operator desk
Operator's PC licence keyDesign & Project desk + Operator desk
this guide
Admin PC licence keySales desk + Accounts
1 Activate2 The Operator desk3 Send To Print 4 After printing5 Consumption & reports6 Tools 7 The Admin PC8 Renewal & help
1

Install and activate this PC

Your shop has three licence keys, one for each PC. They came in one mail, each with its name.

  1. Open the download link in the licence mail and run the Setup. It puts DTF Powerhouse Delta on the desktop and in the Start menu.
  2. Open the program. It asks for the email address of your shop and the licence key.
  3. Enter the key of this PC - the Operator's PC licence key. One key runs on one PC at a time.
  4. The top of the window now ends with Operator's PC, and Licence in the menu shows which key this is, until when it is valid, and the Terms & Conditions.
Moving to another PCLicence → Disconnect Licence From This PC on the old PC, then activate on the new one. You can do this yourself twice; after that we reset it for you.
InternetThe program checks its licence with our server. Without internet it keeps working for 72 hours, then waits until the connection is back.
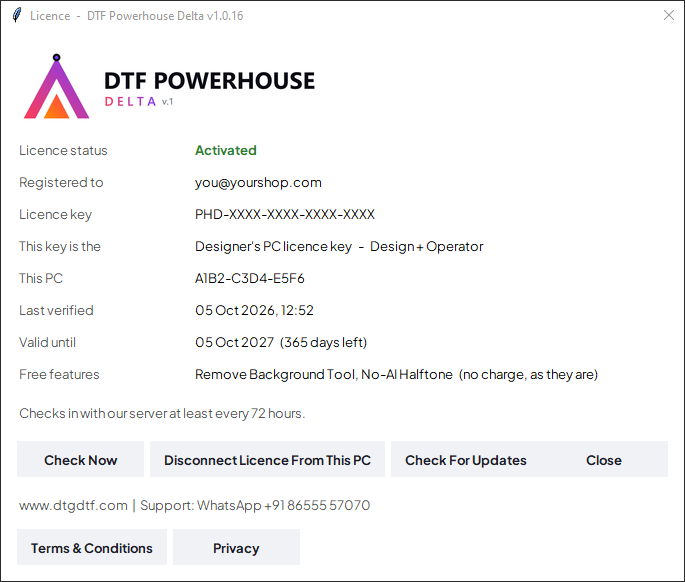
The Licence window of DTF Powerhouse Delta
Licence → Licence...: which key this is, what it opens, the free features, and the agreement. Tap the picture to see it large.
2

The Operator desk: what is ready to print

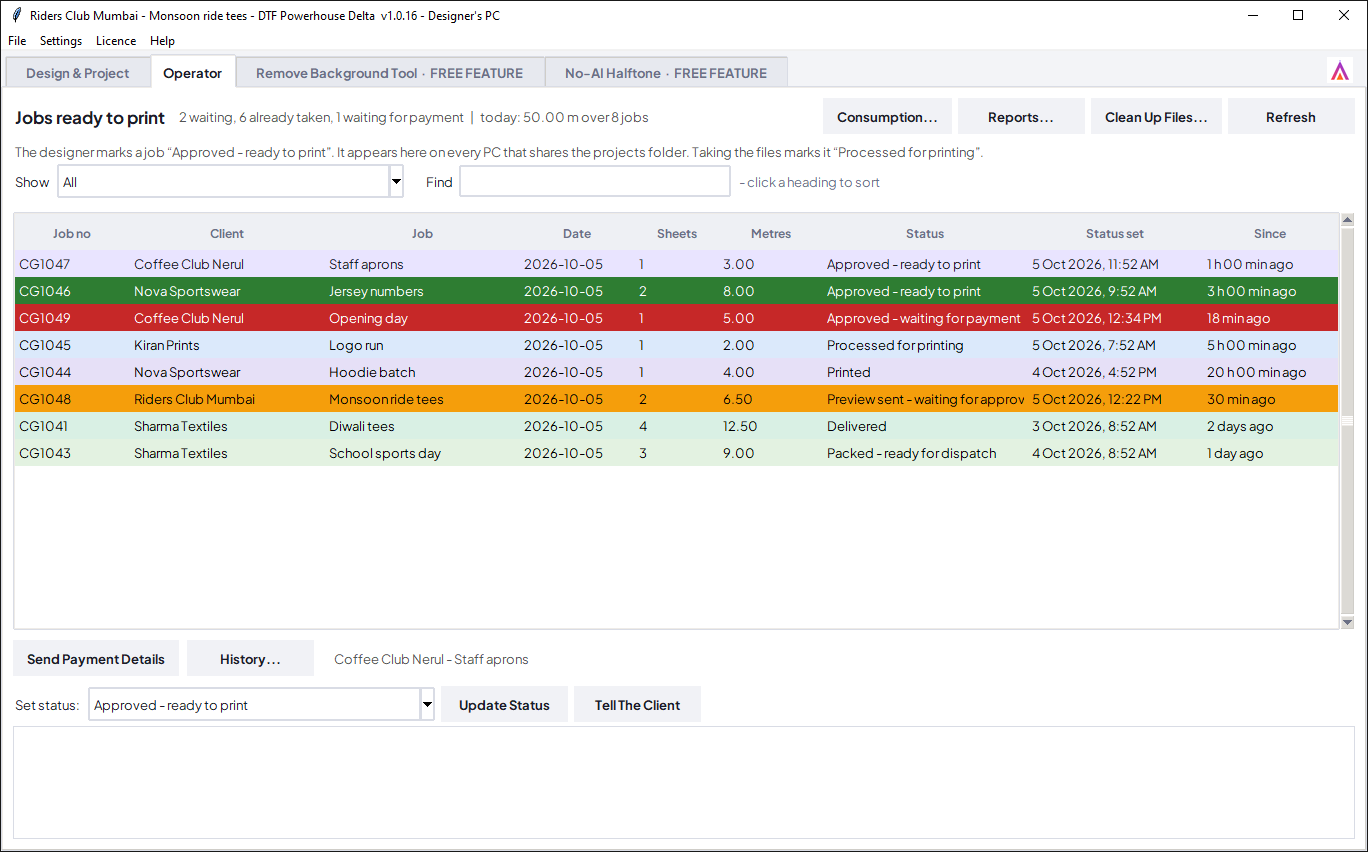
Every job of the shop, at every stage, on one list. What is ready to print is on top.

The Operator desk of DTF Powerhouse Delta with jobs at every stage
The Operator desk. Tap the picture to see it large.
ColourThe job is
greenApproved - ready to print. Yours to take.
redApproved - waiting for payment. Do not print until the payment is in.
orangePreview sent. The client has not approved yet.
paleProcessed, printed, packed, shipped or delivered.
  • The line on top counts them: how many are waiting, how many were taken, and today's metres.
  • Show lists one stage only. Find takes any words: job number, client, job name, WhatsApp number.
  • Click a heading to sort by it. Refresh reads the shop's list again now.
  • A job whose client was flagged by Sales flashes on the list.
  • Right-click a job for more: open it, its history, tell the client, payment details.
3

Send To Print

The program makes the print file for your printer, with the white under the colour in place.

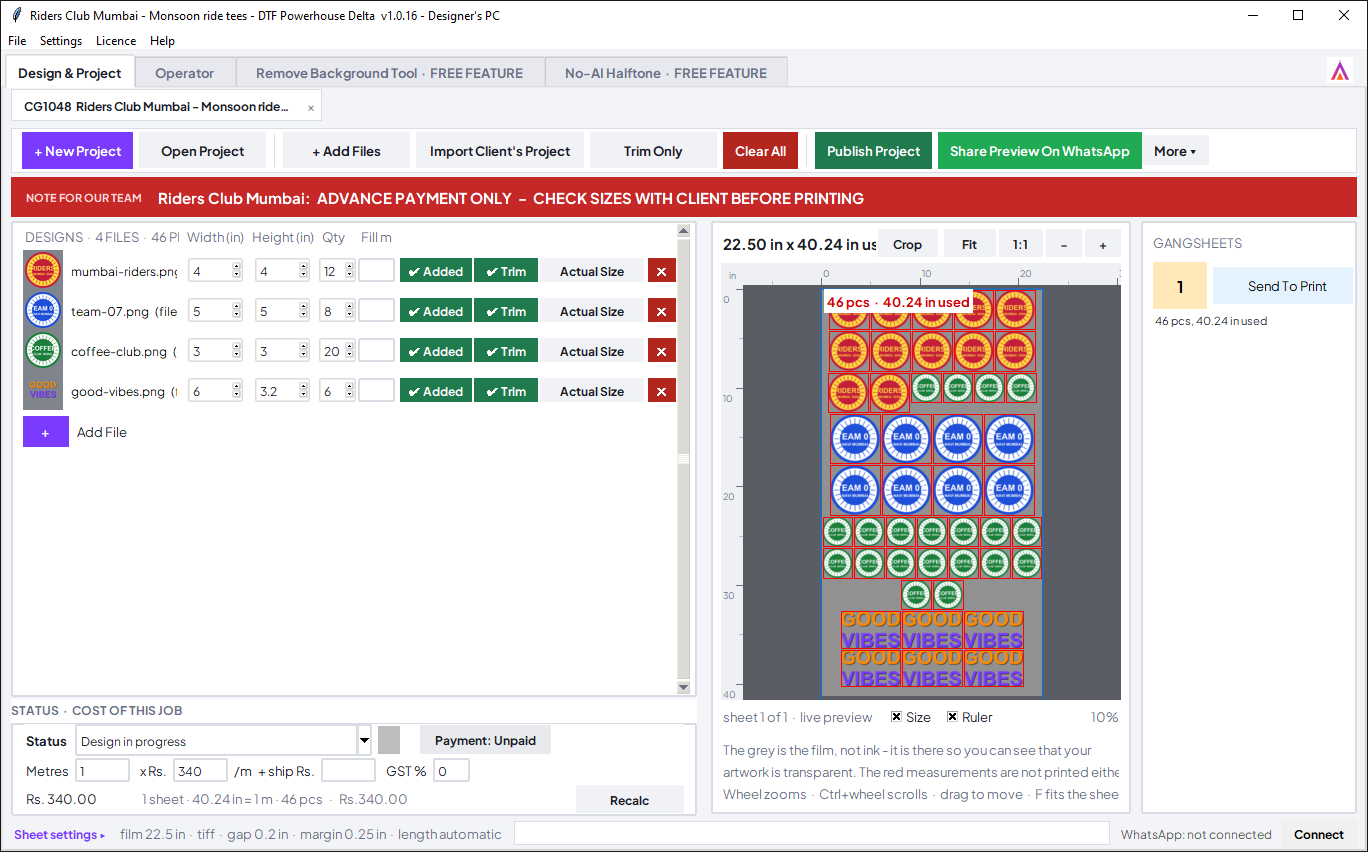
  1. Double-click the job on the list. It opens in Design & Project.
  2. Read the red note over the job, if there is one.
  3. On the right, each gangsheet has its own Send To Print. Press it.
  4. Choose the print mode and press Save To Print Folder (or Choose Where To Save...).
  5. The button becomes a bar with the percentage. When it is done the button turns green, and the job is Processed for printing on every desk - nobody sets that by hand.
  6. Load the print file in the printer's own program and print, as you always do.
The percentage is on the buttonWatch the Send To Print button of the sheet: it fills as the work goes, with the percentage on it.
The print folderSettings → Default Settings... → Print folder: the folder your printer's program reads from. Set it once and Save To Print Folder appears.
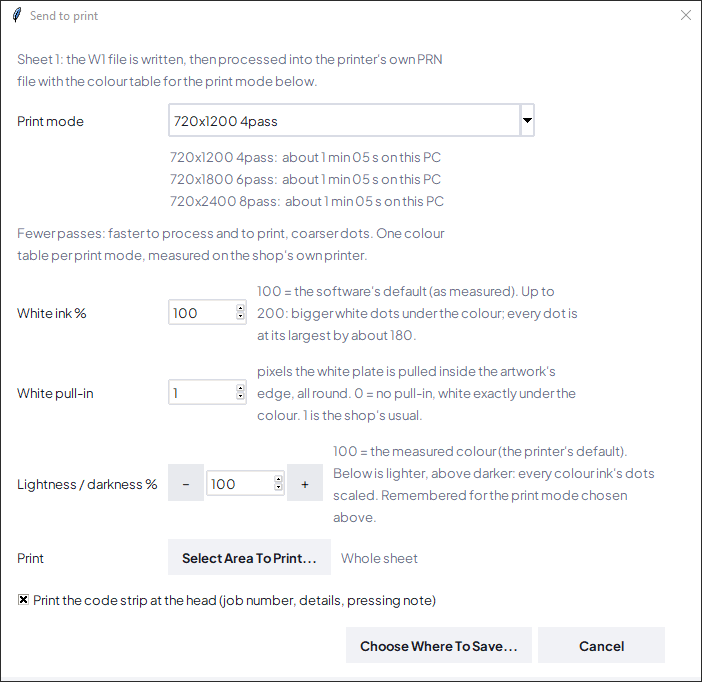
The Send To Print window with print mode, white ink and lightness
Send To Print asks how this sheet is to be printed. Tap the picture to see it large.
In the windowWhat it means
Print mode4 pass, 6 pass or 8 pass. Fewer passes are faster to process and to print, with coarser dots. The window says about how long each takes on this PC.
White ink %100 is the measured default. Higher puts more white under the colour.
White pull-inHow many pixels the white is pulled inside the edge of the artwork, so no white shows around it. 0 is none.
Lightness / darkness %100 is the measured colour. Below is lighter, above is darker. It is remembered for the print mode.
Code stripPrints a strip at the head of the sheet: job number, details, pressing note, PAID or UNPAID, and a code to scan.
4

After printing: say where the job stands

Processed for printing→Printed→Packed - ready for dispatch→Shipped→Delivered
  1. Select the job on the Operator desk.
  2. Set status: choose the stage and press Update Status. Every desk and the customer's page show it at once.
  3. Tell The Client sends that status to the client's own WhatsApp chat.
  4. Shipped asks how it is going: the courier and docket number, or who collects it. The client sees this, so write it the way you would say it.
ButtonWhat it does
Send Payment DetailsSends the shop's bank and UPI details to this client.
History...Every status of this job: when, by whom, from which PC.
The status controls of the Operator desk
Under the list: the selected job, Set status, Update Status, Tell The Client. Tap the picture to see it large.
5

Consumption, reports and disk space

ButtonWhat it is for
Consumption...The running record of what was used: ink, powder, rolls and parts - item, quantity, date, by whom. It is the shop's record, the same on every PC.
Reports...Consumption by month and business by client, on screen, as a chart, and as an Excel file.
Clean Up Files...Removes the print files of printed jobs older than 3 days and this PC's copies of closed jobs, to free disk space. It says what would go and how much it frees, and asks once. The job files stay.
6

The tools

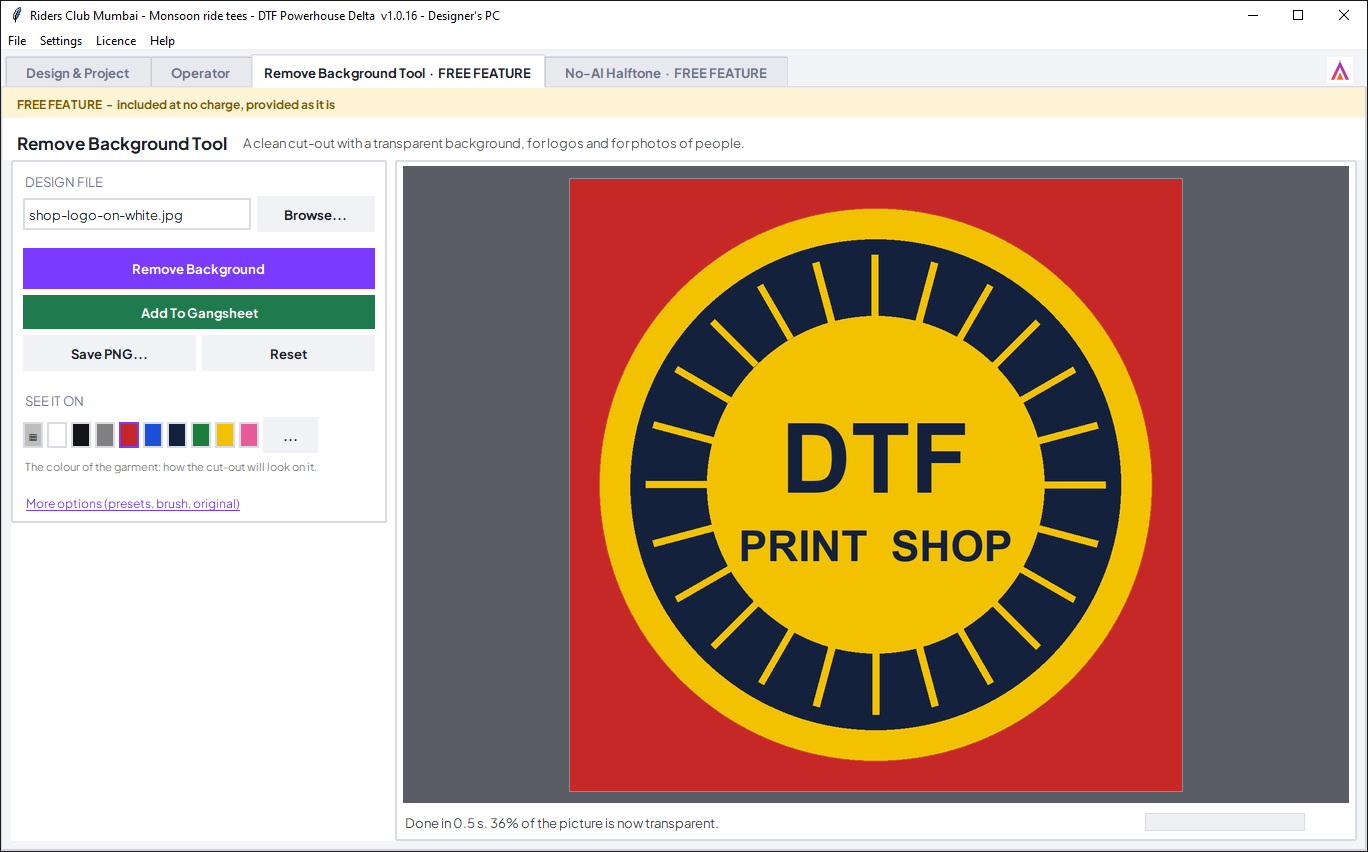
Free featureThe Remove Background Tool and No-AI Halftone - and any tool we add - are free features: included at no charge, provided as they are, and not part of what the licence fee pays for. The program says so on the tab and over the tool.

Your key opens the two tools as well. They work the same way on every PC:

  • Remove Background Tool: Browse..., Remove Background, check it on a garment colour, Add To Gangsheet.
  • No-AI Halftone: Open artwork..., choose a preset, compare Before / After / Split, Add To Gangsheet.

The steps, with pictures, are in the Designer Guide.

The Remove Background Tool marked as a free feature
The tool says FREE FEATURE on its tab and over the tool. Tap the picture to see it large.
7

What the Admin PC sees

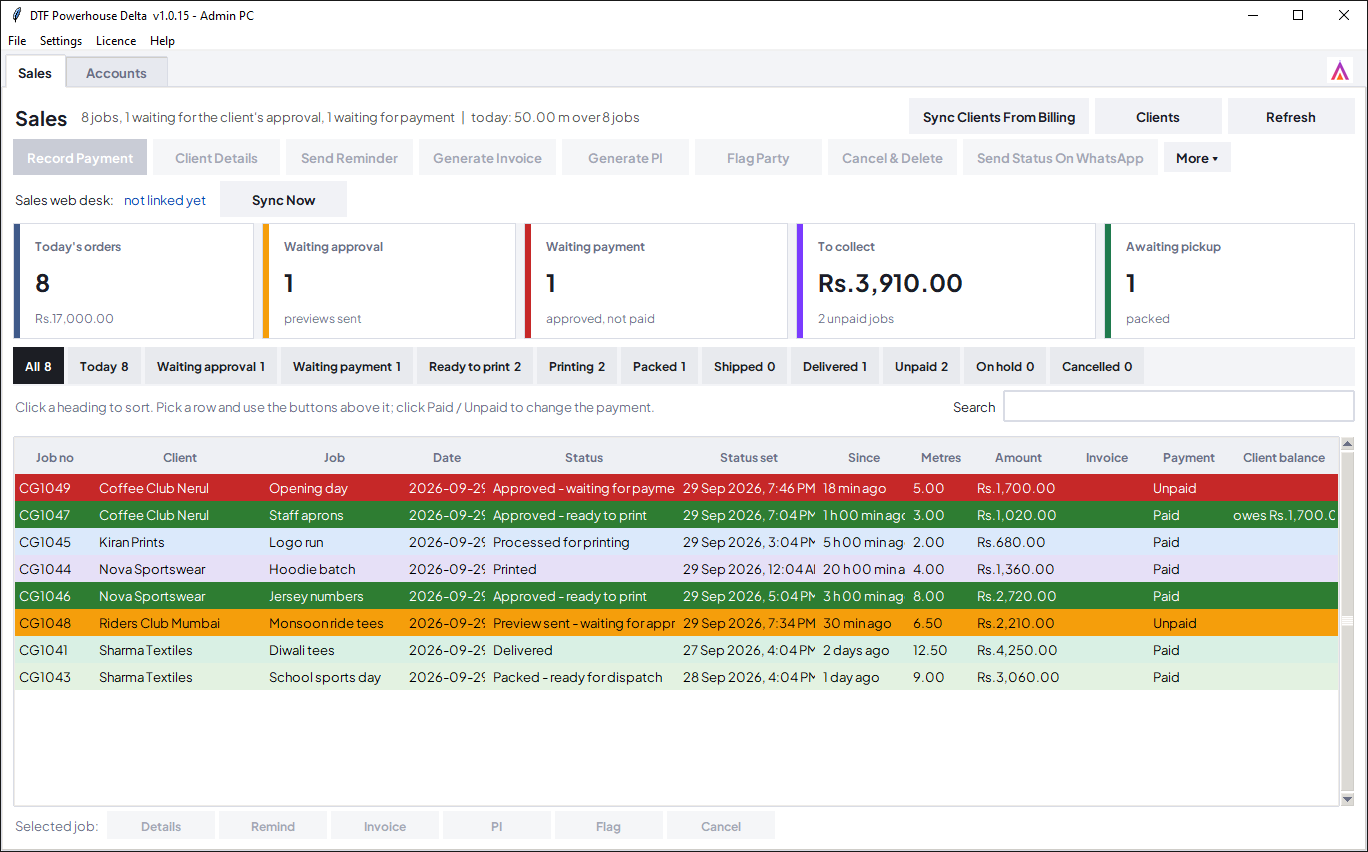
The third key opens the Sales desk and the Accounts - not the design desks and not the tools. It works on the same jobs as your list.

The Sales desk of DTF Powerhouse Delta on the Admin PC
The Sales desk on the Admin PC: the day in tiles, a tab for every stage, payments per job. Tap the picture to see it large.
  • Record Payment notes that a job is paid and how, with the proof. A job that is paid moves out of the red.
  • Flag Party gives a client 1 to 5 stars: their jobs flash on your list.
  • Client Details: contact, GST, addresses, rates, order history and balance.
  • Accounts: sales, payments received and pending, costs, profit and metres printed, for any period, with an Excel export.
  • What the software worked out from the prints and what the technician entered in Consumption are kept apart, side by side.
8

Renewal, terms and help

  • 8 days before the licence ends the program tells you when it opens, once a day, and we write to your shop's email address: contact admin and activate the subscription in advance to avail uninterrupted services.
  • Renewing keeps the same three keys. Nothing is reinstalled, nothing is lost.
  • If a licence runs out, the program stops on all three PCs until it is renewed. Your jobs, clients and accounts stay as they are.
  • Updates arrive in the program: Licence → Check For Updates....
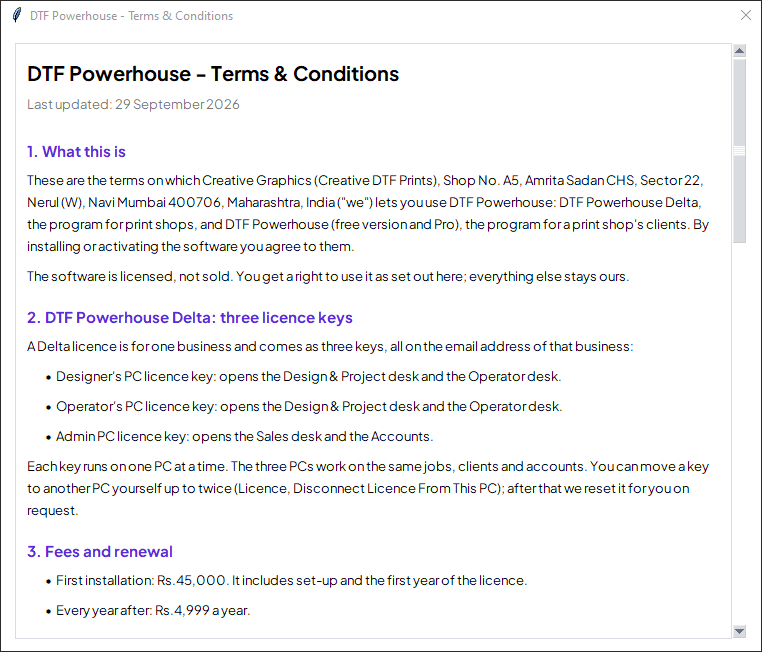
  • Help → Terms & Conditions and Privacy show the agreement inside the program; the same text is on this website.

WhatsApp +91 86555 57070

The renewal notice"Your licence ends on ... Contact admin and activate subscription in advance to avail uninterrupted services." It shows when the program opens, once a day, from 8 days before the end. The Licence window says it too.
The Terms and Conditions window
Help → Terms & Conditions, inside the program. Tap the picture to see it large.