AcroRIP 11.2 for the L18050, Setting by Setting: Ink Channel Sequence, Paper Type, DPI, Template, White and Export
Published 12 December 2023
Every week someone asks how to set up AcroRIP for the L18050, what sequence the inks should be in, and why their white is sticking out of the colours. In December 2023 I sat at the PC and went through every setting I use, with a converted L18050 beside me. Whether your copy of 11.2 is original or what the trade calls the Chinese version, the settings are the same. Here is the whole tutorial in English, in the order the software shows it.
What the video shows
- 0:03 — What this covers: AcroRIP 11.2 on the L18050
- 1:02 — Damper sequence does not matter if you set channels in AcroRIP
- 2:13 — XP600 custom manifold vs original L18050 manifold
- 3:33 — My sequence: K W M C Y W, two whites at the ends
- 3:28 — Layout: 30 cm width; repeat and duplicate
- 4:30 — Printer: select L1800 beta; paper width detection off; plain paper
- 5:21 — DPI: 720 (1440 if head and inks are good)
- 5:53 — Sheet-fed, not roll; the PE/PW module
- 7:23 — Dot size: medium plus large
- 7:53 — Colour setup: match the channels to your dampers
- 9:33 — Template: 28 × 38 cm with 1 cm margins; never edge to edge
- 10:39 — CMYK ink percentage: 40 to 60, test
- 11:10 — White: 100 percent for dark, gradient for light; choke 2 to 20 px
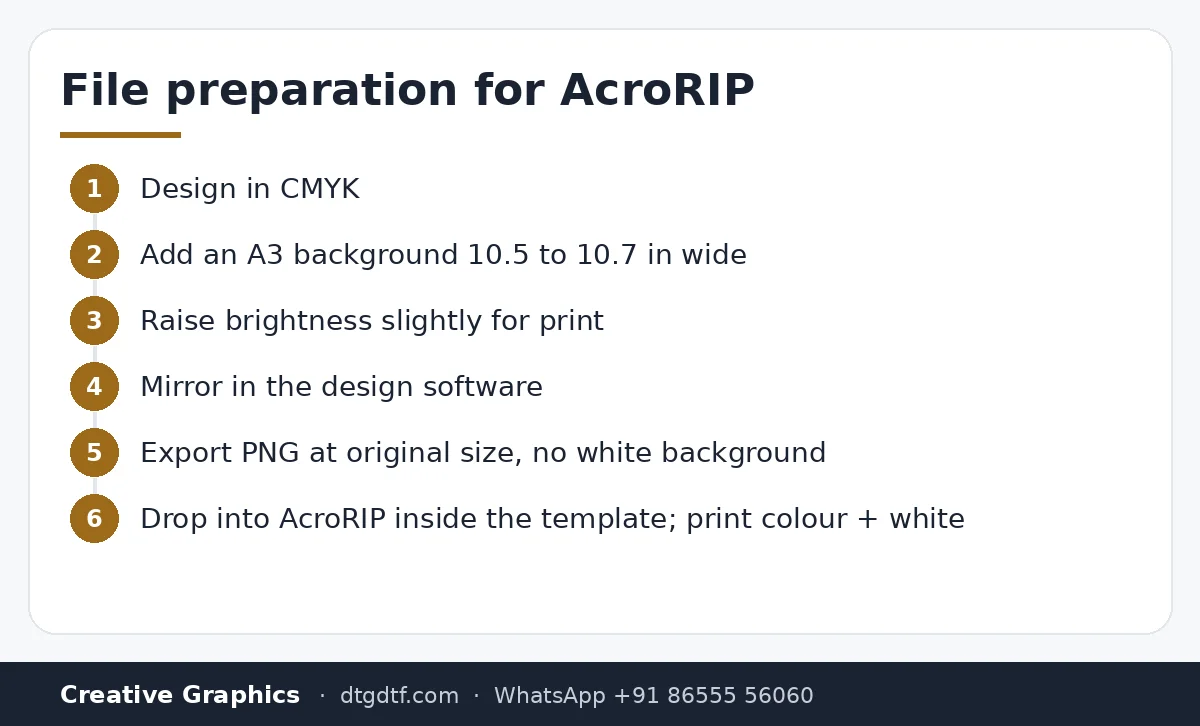
- 13:17 — Design in CMYK, add A3 background at 10.5 to 10.7 in, mirror, export PNG
- 16:07 — Print: both colour and white; 180 nozzles
- 17:06 — Screen vs print: raise brightness before export
- 19:56 — Light garments: gradient white or colour only
Damper sequence: stop worrying
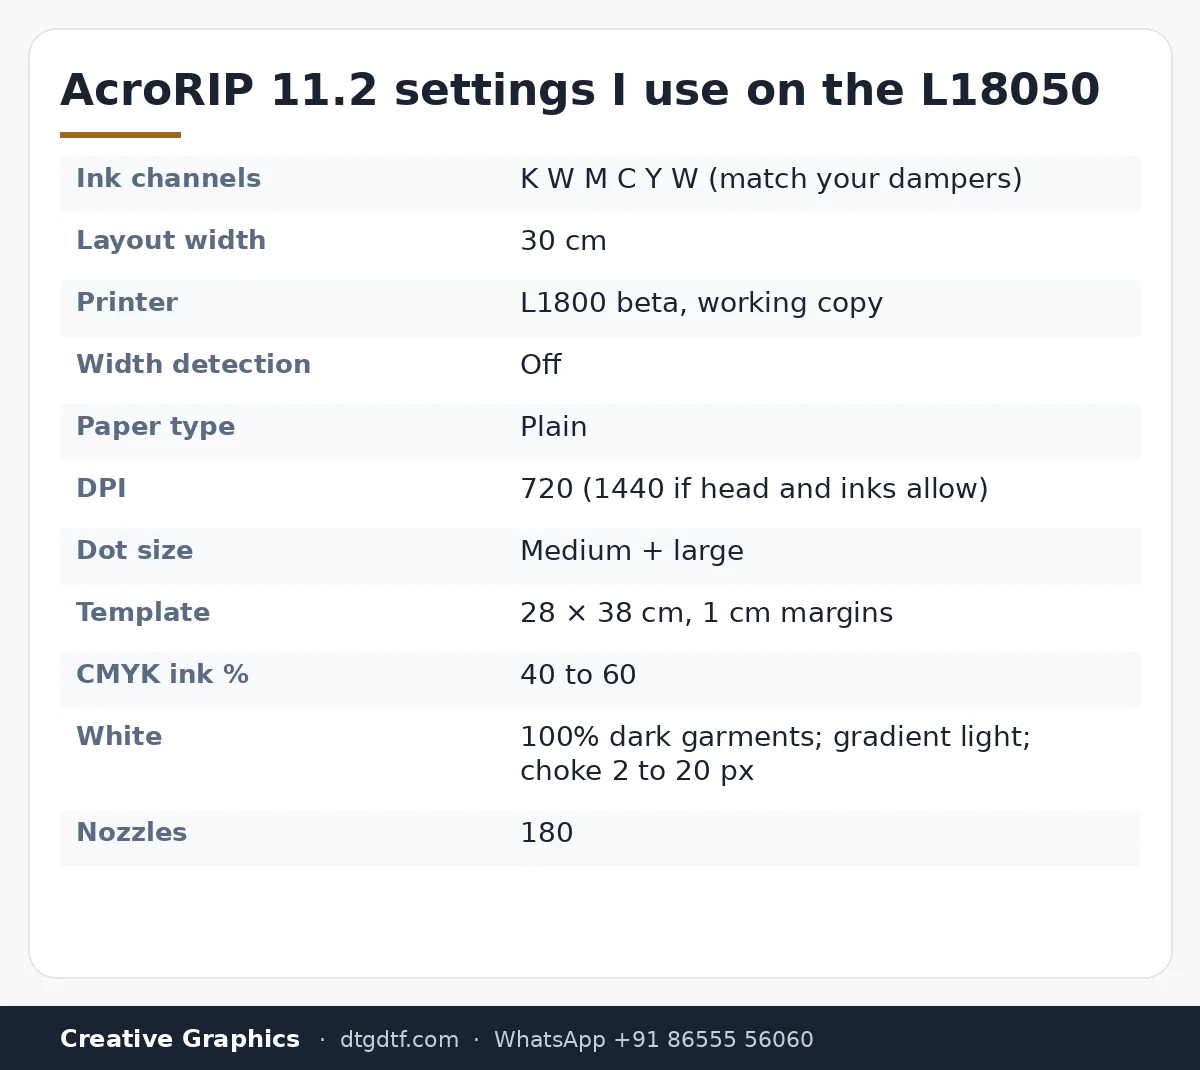
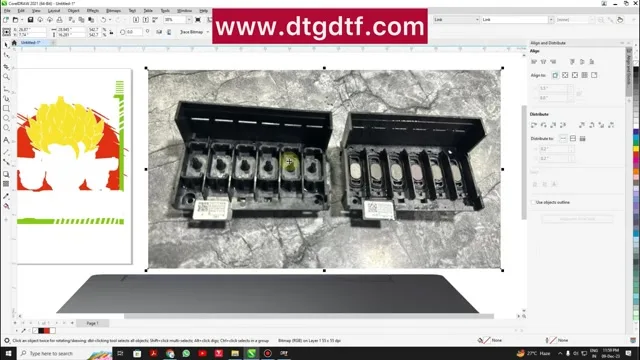
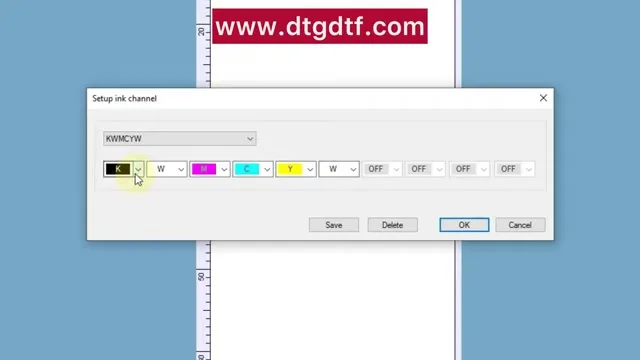
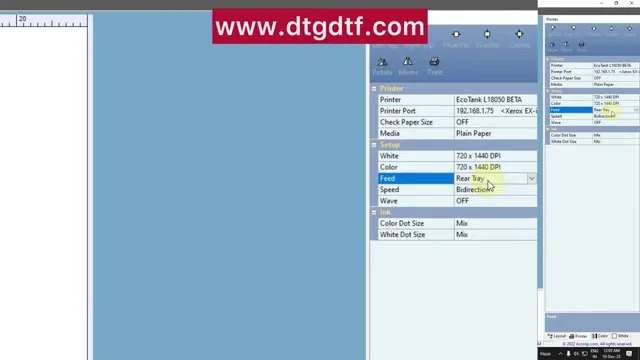
With an original AcroRIP you do not have to worry about which damper carries which ink. You open the colour setup and tell the RIP what is where. Whether you have the XP600-style custom manifold or the original L18050 manifold, the dampers run 1 to 6 left to right; whatever you filled, match it in the software. I always use K W M C Y W: two whites on the two outer dampers, CMK between. If you filled something wrong, you fix it in AcroRIP, not by draining the printer.
Layout and printer
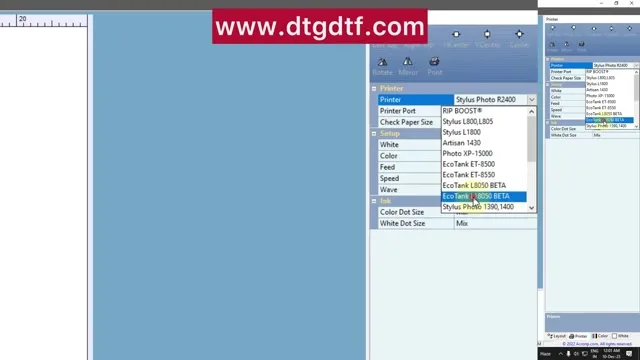
Layout width 30 cm; it is only a canvas and has nothing to do with quality. Repeat and duplicate in X and Y from the same panel. Under Printer, select the L1800 beta entry and then your working printer (copy 1, copy 2, whichever Windows made). Paper width detection off, always, or the printer tries to measure the film. Paper type plain; film is thin, and premium glossy does nothing for quality in AcroRIP. DPI 720, or 1440 if your head and inks are good and you can afford the speed. Sheet-fed, not roll: we tried roll on this printer and settled on sheets, which is where it is the best small printer I have used. The PE/PW module on every printer we sell means no tape on the sheet.
Dot, template, ink
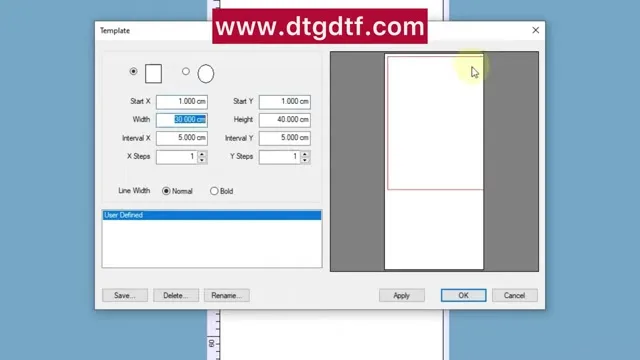
Dot size medium plus large; many keep mixed; test both. Make a template: 28 × 38 cm with a 1 cm margin on every side, saved for the sheet-fed printer, and never print outside it or edge to edge. If you need edge to edge production, that is a 12-inch dual head or i3200 machine, not this. CMYK ink percentage is not standard: 40 to 60, I use 60; reduce if ink floods, raise for very light images.
White
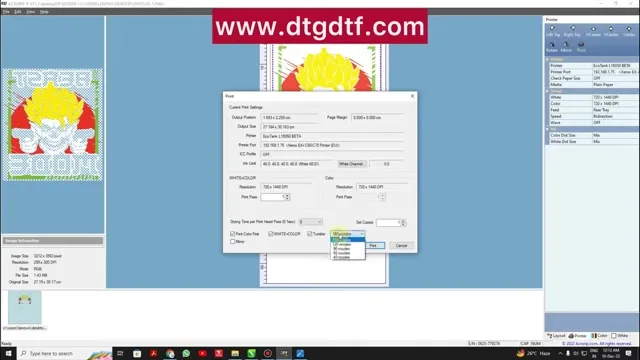
Dark garments: 100 percent white under any colour pixel. Light garments: gradient white, or no white at all. Choke: the setting that pulls the white in by 2 to 20 pixels from every edge so white does not peek out of the colour. I keep it around 2.
The file
Design in CMYK; RGB cannot become CMYK but CMYK can become RGB, so colours survive. Put an A3 background behind the design but make it 10.5 to 10.7 inches wide, not 297 mm, so it lands inside the template with room. Mirror it, export as PNG at original size, no white background. Drag it into AcroRIP, keep it inside the box, print with both colour and white ticked, 180 nozzles; reducing nozzles is for industrial heads, not a converted desktop printer.
Screen versus print
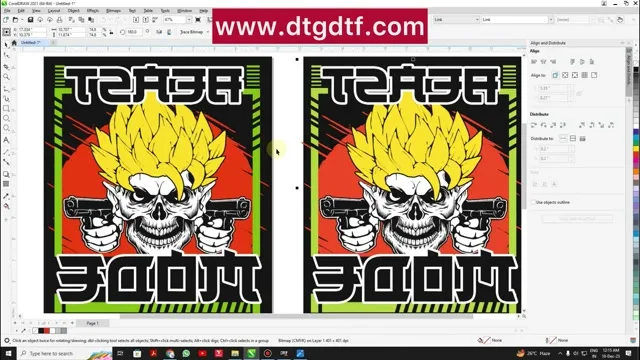
What you see on a lit display is not what comes off the printer; the print is lighter in colour terms and darker in tone. Raise the brightness of the CMYK file before exporting, print both and compare once; after that you will know your offset. And mirror in the design software rather than in the RIP; it rips faster.
Software and printer
Original AcroRIP 11.2 with dongle is on the store as DTF RIP 11.2. The printer in the video is the converted L18050 with the PE/PW module. Roll printing is handled separately by ZiggRoll V4, which takes the ripped job from AcroRIP.
Frequently asked questions
What ink sequence should the L18050 dampers be in?
Any, if you set the channels in AcroRIP to match. I use K W M C Y W with white on both outer dampers.
Which printer do I select in AcroRIP 11.2?
The Epson L1800 beta entry, then your working printer copy. Paper width detection off.
Which paper type and DPI?
Plain paper; 720 dpi, or 1440 if the head and inks are good.
How do I stop white showing outside the colours?
Use the choke setting: pull white in by 2 to 20 pixels from every edge.
White settings for light garments?
Gradient white, or no white at all. 100 percent white is for dark garments.
Why is my print darker than my screen?
Displays are lit; prints are not. Raise the brightness of the CMYK file before export and compare once.
Related guides
- What is DTF Printing? Direct-to-Film Explained Simply
- DTF Printer Buying Guide — What to Look For (and Avoid) in India
Settings still not right?
Send a photo of your print and your AcroRIP screen on WhatsApp.
WhatsApp +91 86555 56060